Instructions for setting up an ABB or Busch Welcome door communication system in the EisBaer SCADA V2
First important information: Only one EisBar door communication user is allowed per ABB Welcome IP gateway.
For each ABB Welcome IP gateway user, only one mobile device with a fixed IP address or dyndns account is generally permitted (iOS, Android, EisBaer). This means that for every EisBaer indoor station one Welcome IP gateway has to be installed.
Firmware V 3.13 from 1.7.2015 or newer must be used in the IP gateway.
Downloadlink: http://www.busch-jaeger-katalog.de/artikel.php?bereich=1016301&programm=1016477&gruppe=1016493&produkt=1016494
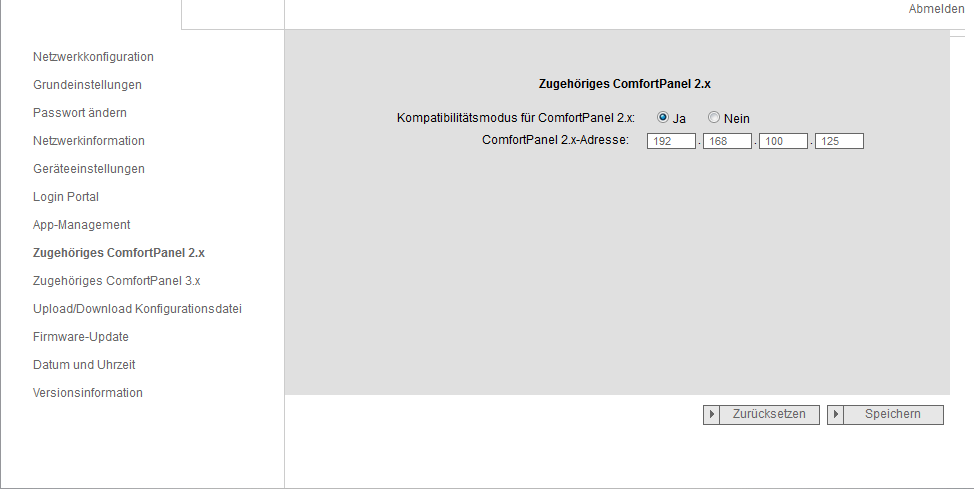
The compatibility mode for ComfortPanel 2.x must be activated and the IP of the EisBaer client must also be specified.
Under "Associated ComfortPanel 3.x" a user must be created with a password.
Important note about sound quality or feedback:
The quality of the call is directly related to the equipment used (Touch PC ....) Of the computer used to display the EisBaer client.
Via the Advanced IP Scanner, the plant is called: "ABB Genway Xiamen Electrical Equipment CO., LTD".
Configuration of the IP-Gateway 2.0 / 3.0:
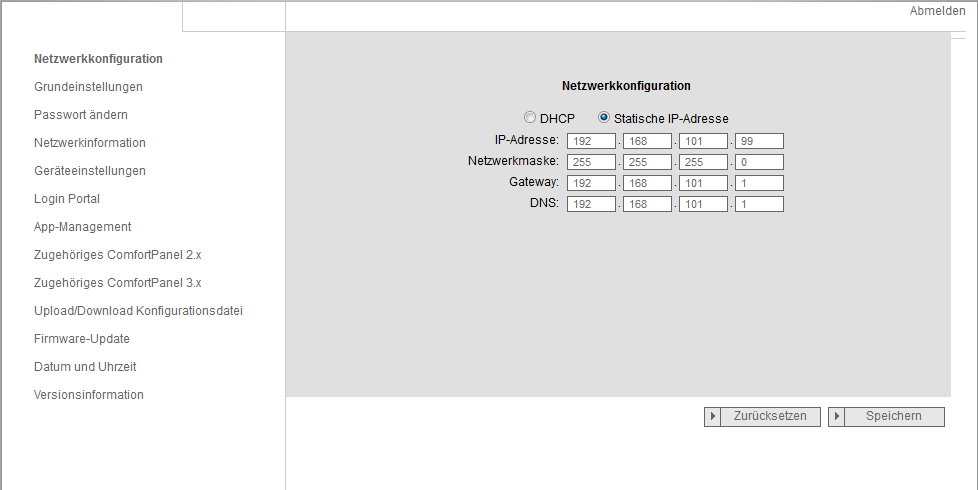
A fixed IP address should be used for the gateway, as otherwise connection errors may occur.
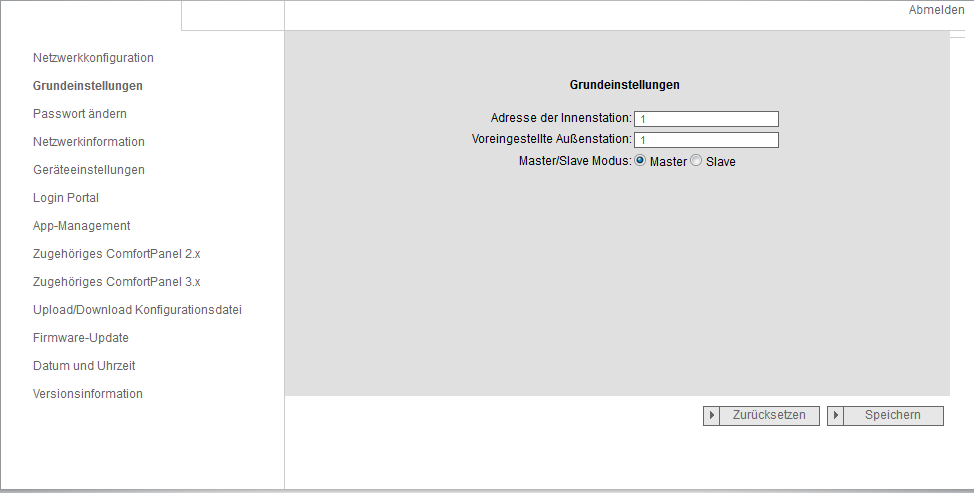
Basic settings:
System-specific, at least one unit must be created with ID 1.
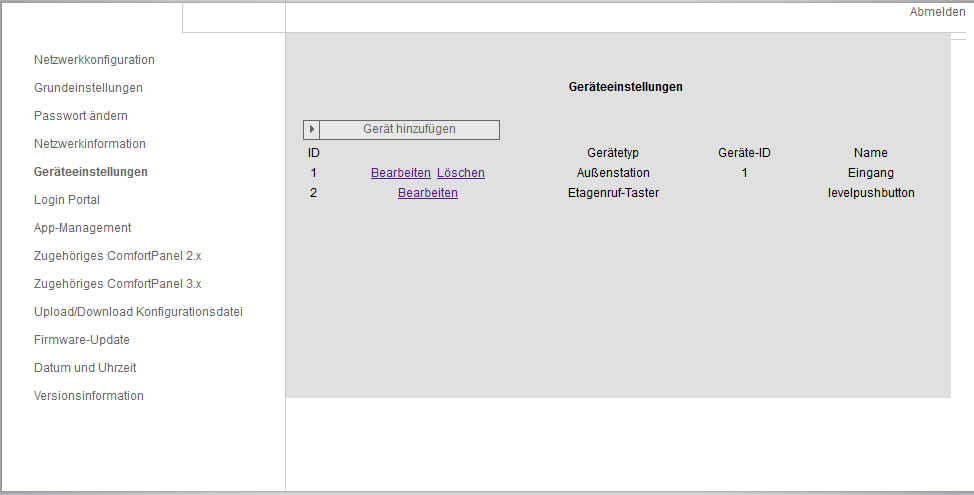
Device settings:
Each outdoor unit must be created with the corresponding ID.
Associated ComfortTouch 2.x:
Here, the 2.x series is activated and the IP address of the associated EisBaer client is entered.
Associated ComfortTouch 3.x:
Register user
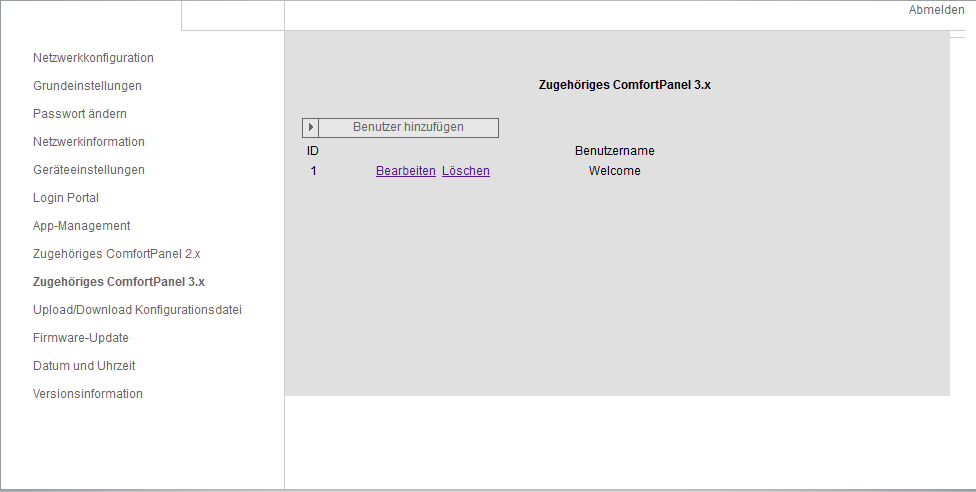
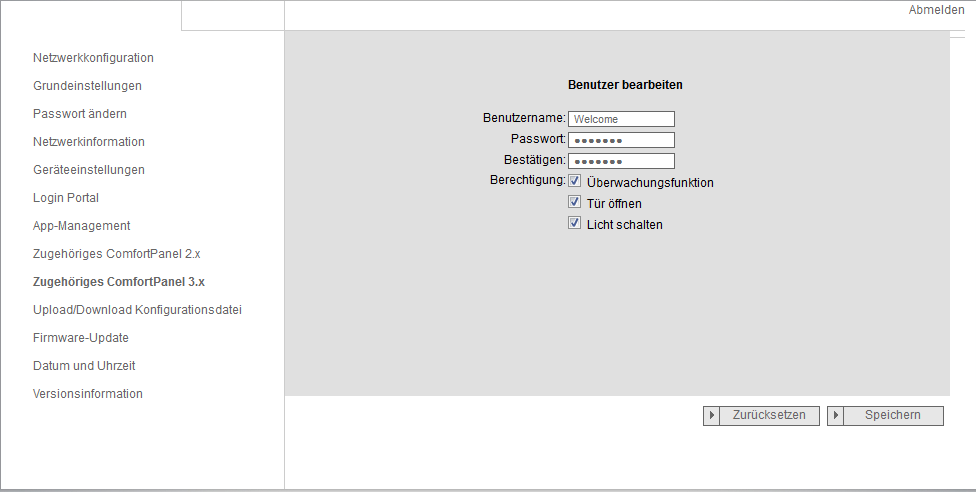
For the user, all authorizations must be enabled here.
Creating the "indoor station" in the EisBaer editor
To set up an indoor call station in the EisBaer SCADA visualization, you need the "Video Doorphone" component in the Communications component chapter.
On the side you pull the component as far as possible, that the buttons but also the video image is easy to use or visible.
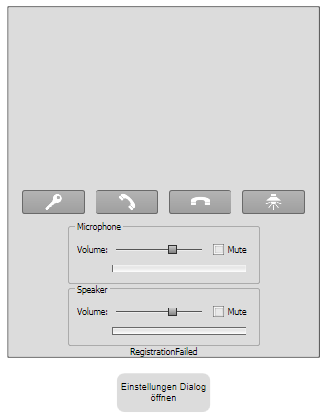
1.Operation of the door opener
2.Acceptance / Structure Call of the external station
3.End call
4.Actuation of the light relay
5.Adjust the volume / mute of the microphone on the EisBaer page
6.Adjusting the volume / muting of the speakers on the EisBaer side
Settings of the component in the EisBaer editor:
These settings are for testing only in the editor. These are not transmitted to the client. If several EisBaer clients are in use, each client must be configured separately.
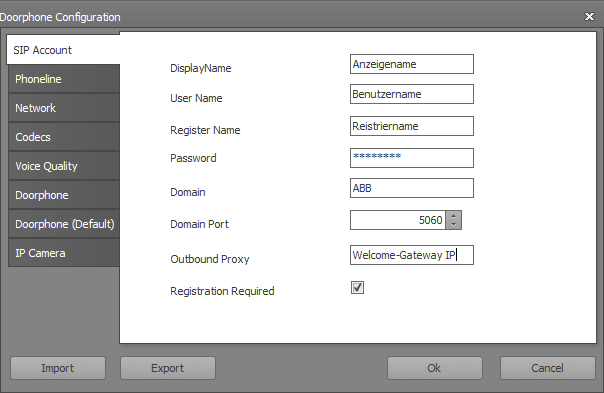
Display name: The name (plain text) of the external unit can be entered here. However, it is not displayed.
User name: User name that is created inthe Welcome IP gateway under "Associated ComfortTouch 3.x".
Registration name: User name that is createdin the Welcome IP gateway under "Associated ComfortTouch 3.x".
Password: Password that is created in the Welcome IP gateway under "Associated ComfortTouch 3.x".ATTENTION: The password must be different from the name!
Domain: ABB or the IP address of the corresponding ABB Welcome IP gateway.
Domain Port: 5060
Outbound Proxy: IP address of the corresponding ABB Welcome IP gateway
Registration required: Yes
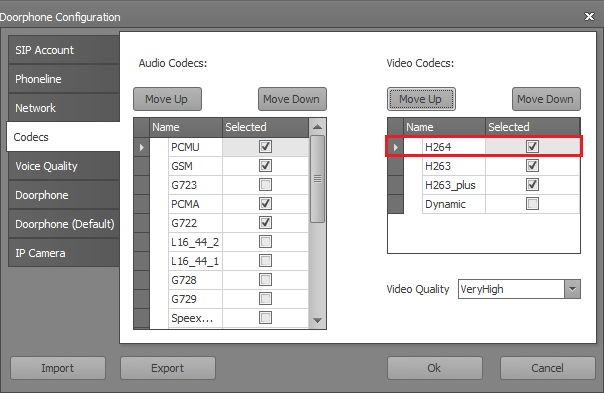
Important: The video codec "H264" must be at the top!
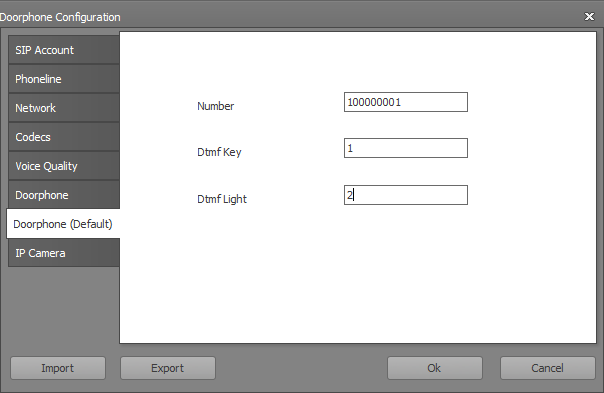
Number / Name Station: 100000001 The number on the far left (1) stands for the address of the outstation. The number on the far right (1) stands for the address of the bell button.
DTMF signal door open: 1
DTMF signal switching light: 2